Part 2.
An extended transcript of my session @ SCOMathon 2021.
I hope the demo from the first part demonstrated how easy you can add new views to SCOM Console. With just few lines of code and some time spent in forms designer we created not just a simple static extension, but also demonstrated access to shared management group connection. And, in fact, we added a new function to the SCOM console – view currently connected users! So, if you’re looking for such functionality in your production environment, you can take this example and modify it to be a fully functional add-on to your console.
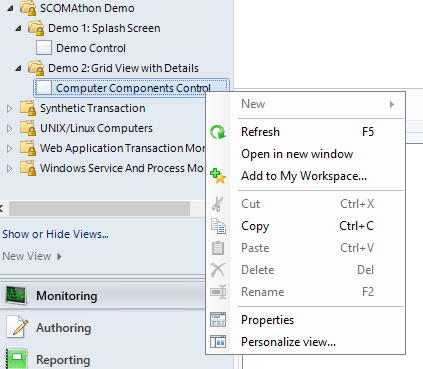
Example #2: Grid View with Details.
Now, let’s create a bit more sophisticated component featuring grid view for objects and object detail view. The grid control will show a list of all Windows Computers in SCOM. At the same time, the detailed view, attached to the grid, will show logical disks hosted at the selected computer object and their sizes.
To start with, open VS and, similarly to the first example, create one Operations Manager MP project and one class library project. Sign both projects and add the class library to MP’s reference (don’t forget to set the “package to bundle” option). In other words, do all the same preps as in the first demo.
Step aside: Base classes.
Before continuing with the example, I have to talk about base classes. In the fist example we used MomViewBase class, which is the most base class for SCOM console view implementations. As per its role, MomViewBase provides very basic features and from UI perspective it’s a simple empty canvas. So, the question is: if we’d like to create a grid view, which looks naturally and like all native SCOM Console views, is there a base class for this? Luckily, the answer is yes. But there is still a catch. So…
After the most core MomViewBase base class, next most used component type is GridViewBase<T, U>. This class is a base class for implementation of the most used view types — Microsoft.SystemCenter.StateViewType. Other successors of this class are:
- Agent Managed Computers view
- Installed Management Packs view
- Discovered inventory view
- And so on, there are 52 direct successors for
GridViewBase<T, U>class.
The GridViewBase<T, U> generic class has two type parameters to define when create an end-use component class.
The first type <T> defines type of an object passing to the detail view, returned by the query (see below), and displayed in the grid.
The second type <U> should be inherited from the generic Query<T> class. It implements a query returning objects to display in the grid. The <T> type in the GridViewBase and Query must be the same. In other words, it can be said that the full class definition (for simplicity purposes only) is GridViewBase<DataType, Query<DataType>>.
You can use absolutely any type for your display / exchange / query object while it makes sense for your task.
In this example I’m using ready-to-use query implementation class: StateQuery. As StateQuery returns InstanceState objects, I have to use this as the entity type.
But the trick is that the GridViewBase<T, U> class is not a fully cooked component, so it needs some tweaks to be a fully functional view. For example, StateView component has about 1500 lines in its implementation. Unfortunately, implementations like StateView are internal, so we cannot inherit our component from them. On the top of that, none of the classes inherited from GridViewBase<T, U> is designed for further extension. Therefore, unfortunately, we have to get the base class and do quite complex work.
In general, to create a grid view with details view, you have to:
- Choose a type for displayed items. The common choice is
MonitoringObjector pre-definedInstanceState. - Create a query implementation class inherited from
Query<T>, or use pre-definedStateQuery. - Implement detail view class inherited from
CachedDetailView<T>. - Implement grid view class inherited from
GridViewBase<T, U>. - Choose a type to transfer currently selected item from the grid to the detail view (it’s not necessarily the same type as used for displayed items in the grid).
- Implement the
IParentViewinterface in the .
For this demo I decided with the following selection:
- Displayed item type:
InstanceState. - Query implementation:
StateQuery. - Communication grid to detail uses:
PartialMonitoringObject.
So, the plan is set, and we shall be ready to continue with the example. But there is another step aside.
Step aside: VS crashed on Forms Designer.
Now, the most important note.
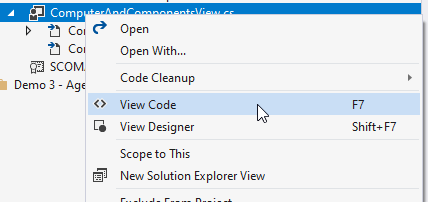
NEVER! NEVER EVER bring up Forms Designer for any components inherited from GridViewBase. This will cause Visual Studio to crash. If you restart it, it will crash again and again, when trying to restore opened windows. To exit the crash loop, delete the .vs folder to erase information about opened windows.
Don’t double click at the component – use View Code from the context menu.
Back to the demo.
Alike the first demo, I’m adding a User Control, but two of them. One user control will be a grid, displaying Windows Computer objects, and another control will be a detail view attached to the grid (to show logical disk information). When controls added to the project, VS immediately opens Form Designer for each of the new controls. Leave Designer opened for the detail view control, but close it for the control, which will be grid control. Go to the code for both controls and change their base class from UserControl to:
/// <summary>
/// Grid to display list of Windows Computer objects.
/// </summary>
public partial class ComputerAndComponentsView : GridViewBase<InstanceState, StateQuery>, IParentView
/// <summary>
/// Detail view component to display logical disk information.
/// </summary>
public partial class ComponentsDisplayControl : CachedDetailView<PartialMonitoringObject>, IDisposable
Note! The types in the generic brackets in the code snippets above are from the design decisions made before. They may be different in another implementation.
Detail View Control
The detail view control is a vary small piece, so let’s start with it. The CachedDetailView<T> is a direct child of MomViewBase, so everything was said about accessors of the MomViewBase class is applicable to accessors of CachedDetailView<T>. The only method, which is critical to override is OnCacheUpdated event handler. I put a ListView control to the detail view, and then added a code, which runs every time the grid changes selected item. As per the project’s design we know, that the grid’s query returns class instances for Microsoft.Windows.Computer SCOM class, there is not need to test the inbound parameters in the OnCacheUpdated method, but not null (also, it’s only used in relationship lookup, so if not a Windows Computer instance, simply nothing would be found). So, the following snippet shows the OnCacheUpdated method implementation and referred fields.
private ManagementPackClass logicalDiskClass = null;
private Guid diskSizeStrPropertyId = Guid.Parse("60c0b971-d523-6564-0be5-e8649e194a25"); // (Get-SCOMClass -id 486adddb-2eb8-819a-fa24-8f6ab3e29543).propertycollection | ft name, displayname, type, id

public override void OnCacheUpdated(PartialMonitoringObject monitoringObjectContext)
{
  lvDisks.Items.Clear();
  if (monitoringObjectContext == null)
  {
    ShowStatusMessage("No computer object selected.", false);
    return;
  }
  HideStatusMessage();
  #region Show information related to the currently selected object
  if (logicalDiskClass == null)
    logicalDiskClass = ManagementGroup.EntityTypes.GetClass(Guid.Parse("486adddb-2eb8-819a-fa24-8f6ab3e29543")); // Microsoft.Windows.Server.LogicalDisk
  if (logicalDiskClass == null)
    return;
  IList<EnterpriseManagementRelationshipObject<MonitoringObject>> allDisksLinks = ManagementGroup.EntityObjects.GetRelationshipObjectsWhereSource<MonitoringObject>(monitoringObjectContext.Id, TraversalDepth.OneLevel, ObjectQueryOptions.Default);
  if (allDisksLinks != null && allDisksLinks.Count > 0)
    foreach (MonitoringObject diskMo in allDisksLinks.Where(r=>r.TargetObject.IsInstanceOf(logicalDiskClass)).Select(dl => dl.TargetObject).OrderBy(o=>o.Name))
      lvDisks.Items.Add(new ListViewItem(new string[] { diskMo.DisplayName, (Convert.ToDecimal(diskMo[diskSizeStrPropertyId].Value) / 1024 / 1024 / 1024).ToString("N2") })); // KB->MB->GB
  #endregion
}
The base MomViewBase class has two useful methods: HideStatusMessage() and ShowStatusMessage(string text, bool showAnimation). The second method display a splash plane with the given status text over all existing control’s elements (and hide them). So, the first method removed this plane. This is used to display a hint when there is nothing to display (like no master object selected).
Otherwise the code above is simply looking for all instances related to the given contextual instance and filter out instances of the Logical Disk class (or its children), then display them.
At this point you may wander how OnCacheUpdated event is being generated. The CachedDetailView<T> class also implements the IChildView interface. The interface has just one method:
void ParentSelectionChanged(IParentView parent, int count);
The SCOM Console application, which is a host for both master and detail controls track user selection changes in the master control, which must implement the IParentView interface, then notify the detail control using the ParentSelectionChanged method and passing the master control as argument. Microsoft implements the IChildView interface at the following:
// (c) Microsoft.
public void ParentSelectionChanged(IParentView parent, int count)
{
  T dataItem = null;
  if (count == 1 && parent != null && parent.SelectedItem != null)
  {
    dataItem = (parent.SelectedItem as T);
  }

  OnCacheUpdated(dataItem);
}

public virtual void OnCacheUpdated(T dataItem)
{
}
So, child classes just need to override the OnCacheUpdated method, which is exactly what we did earlier.
Grid View Control
WARNING! One more warning to never bring up the Forms Designer for any children of the GridViewBase class.
This control is heavy on code, because the base class leaving lots of things not implemented (for better flexibility). Therefore, this example implementation has about 440 lines of code. While some of the code implements nice-to-have features (not all, there are more to be nicer), the half of it is certainly compulsory. The table below shows implementation’s aspects from the top view.
| Aspect | Methods / Constructors / Properties | Compulsory? |
| Standard to MomViewBase. | Constructors:ComputerAndComponentsView()Methods: OnSystemColorsChanged(EventArgs e)Properties: string ViewName | Partial |
| Column setup | AddColumns() | YES |
| Detail View support (IParentView implementation) | Property:ChildViewTypeSelectedItemMethods: GetSelection() | YES |
| Personalization Support | AddContextMenu_Personalization(ContextMenuHelper contextMenu) | NO |
| Support for the “View Entity Properties” dialog | AddContextMenu_InstanceProperties(ContextMenuHelper contextMenu) | NO |
| Extra UI tweaks | AddContextMenu(ContextMenuHelper contextMenu) | NO |
Grid View: Column Setup
Any implementation of Grid View starts from creation of its columns, which is the most trickier part to me. First, to make it look nice and natural, I need some graphic resources (like health and maintenance mode icons). Microsoft UI libraries provide pre-built classes to access these resources, but these classes are internal, so are not available to any 3rd party extensions (like this one). Therefore, in the Init() method I create my own instance of resource manager:
ConsoleResources = new ResourceManager("Microsoft.EnterpriseManagement.Mom.Internal.UI.Views.SharedResources", typeof(UrlView).Assembly);
The resource base name is taken from the standard internal resource access class inside Microsoft UI library. And there is no hidden meaning in the selection of UrlView type — it’s simply one of the classes defined in the required assembly chosen randomly to get a reference to the assembly. Can be any other class from the same assembly.
Then the void AddColumns() methods actually defines all grid view’s columns. There are few tricks and rituals here again (ritual — means I poke it from other Grid View implementations without proper understanding “why?”). So, first, the method features very special handling to add two special columns for instance Health State and Maintenance Mode. Both columns are of the GridControlImageTextColumn class type. In general, the base GridViewBase class has the AddColumn method. This method has 20 overloads (and 0 documentation). The Health State column initialization involved a type translator (a standard one) and a specially constructed object tag. Perhaps, this is to be able to call Health Explorer window on health icon mouse double click — but I don’t know for sure, so simply keep it as ritual. However, what is a known key element here is the CellContentsRequested event and its handler in the StateCellContentsRequested method. The method simply return a health state icon to show. So, final code to add Health State column is the followin:
InstanceStateProperty propertyTranslator = PropertyTranslator as InstanceStateProperty;
GridControlImageTextColumn stateColumn = new GridControlImageTextColumn();
stateColumn.CellContentsRequested += new EventHandler<GridControlImageTextColumn.ImageTextEventArgs>(StateCellContentsRequested);
string str = $"{propertyTranslator.TargetType.Name}-*-{propertyTranslator.TargetType.Id}-*-Health";
AddColumn(stateColumn, ConsoleResources.GetString("State", CurrentCulture) ?? "State", new Field("Health", typeof(int), str, Field.SortInfos.Sortable | Field.SortInfos.Sort, 0), false);
Next to the Maintenance Mode column. In this case, there is no property translator is not required, and I simply provide a dictionary translating serialized values to images (i.e. true to MM icon, and false to empty image).
DataGridViewColumn MaintenanceModeColumn = AddColumn(new GridControlImageTextColumn(
  new Dictionary<string, Image>
  {
    { true.ToString(), (Image)ConsoleResources.GetObject("MaintenanceModeImage", CurrentCulture) },
    { false.ToString(), new Bitmap(16, 16) }
  },
  new Dictionary<string, string>
  {
    { true.ToString(), ConsoleResources.GetString("InMaintenanceMode", CurrentCulture) },
    { false.ToString(), ConsoleResources.GetString("NotInMaintenanceMode", CurrentCulture) }
  })
{
  DefaultKey = string.Empty,
  Width = 22,
  ShowText = false,
  DefaultHeaderCellType = typeof(GridControlImageColumnHeaderCell)
}, typeof(bool), ConsoleResources.GetString("MaintenanceModeText", CurrentCulture), "InMaintenanceMode", false, false);

GridControlImageColumnHeaderCell headerCell = (GridControlImageColumnHeaderCell)MaintenanceModeColumn.HeaderCell;
headerCell.Image = (Image)ConsoleResources.GetObject("MaintenanceModeImage", CurrentCulture);
headerCell.ImagePadding = new Padding(2);
All other columns are specific class properties, i.e. properties of Microsoft Windows Computer class in this case. However, the way, how class properties added to columns, is universal, so can be used with any set of properties. There two paths of handling different types of class properties. For string and integer properties we can use ManagementPackProperty instance as a column tag directly. For all other property types, wrapping in a Field object is required. Note, that Enum type is handled as string (i.e. serialized). Final generic snippet to add SCOM class properties as columns looks like this:
foreach (ManagementPackProperty property in GetViewClass().GetProperties()) // Microsoft.Windows.Computer)
{
  Type type = property.SystemType;
  Type contentType = null;
  if (type == typeof(string) || type == typeof(int))
    contentType = type;
  string headerText = property.DisplayName ?? property.Name;
  if (contentType == null)
  {
    if (type == typeof(Enum))
      type = typeof(string);
    Field sortField = new Field(null, type, property, 0);
    DataGridViewColumn dataGridViewColumn = AddColumn(new GridControlTextColumn(), headerText, sortField, true);
    dataGridViewColumn.Visible = true;
    dataGridViewColumn.FillWeight = 1f;
  }
  else
  {
    DataGridViewColumn dataGridViewColumn = AddColumn(contentType, headerText, property, true);
    dataGridViewColumn.Visible = true;
    dataGridViewColumn.FillWeight = 1f;
  }
}
Grid View: Detail View Support
Second compulsory part is implementation of the IParentView interface. This interface is used to update detail view control when selection in the grid has changed. IParentView is a simple interface and has just three members
| Member | Description |
|---|---|
| ChildViewType (property) | Returns a type of detail view control for this master grid view. SCOM Console will automatically create a control of this type and attach it to the grid. |
| SelectedItem (property) | Returns an object representing the currently selected row in the grid view (singular), or null if nothing is selected. The type of returned object can be any, but it must be expected by the detail view control. |
| GetSelection() (method) | Returns an ICollection object with a list of objects representing all currently selected rows in the grid view. The type of objects in the collection can be any, but it must be expected by the detail view control. |
So, the snippet below shows my implementation of the IParentView interface in the grid view component. Note, that the snippet doesn’t have the GetSelection() method implementation (but it’s implemented in the demo code). This is because the detail view control (as was shown in the previous section) doesn’t support multi-selection, and simply considers “multiple items selected” as “nothing selected”.
/// <summary>
/// Implements IParentView.ChildViewType. Returns component type, which implements detail view.
/// </summary>
public Type ChildViewType => typeof(ComponentsDisplayControl);

/// <summary>
/// This method is called from <seealso cref="CachedDetailView{PartialMonitoringObject}"/> ParentSelectionChanged method, where the returned object is casted as T.
/// </summary>
public object SelectedItem
{
  get
  {
    if (Grid == null || Grid.SelectedRows == null || Grid.Rows == null || Grid.Rows.Count == 0 || Grid.SelectedRows[0] == null)
      return null;

    if (Grid.SelectedRows[0].Cells[0].Tag is GridDataItem tag)
    {
      InstanceState selectedCellContents = (InstanceState)tag.DataItem;
      return selectedCellContents.GetPartialMonitoringObject(ManagementGroup);
    }
    return null;
  }
}
There is no need to track or raise an event on user selection change in the grid view. SCOM Console as hosting application and the base GridViewBase class will do this automatically.
Grid View: Personalization Support
Implementing support for personalization is not compulsory, but highly desired. Personalization allows SCOM Console operator setup column visibility, column display order, sorting, and grouping using the standard dialog box.

The MomViewBase class has a read-only property called Configuration. This is an instance of the ViewConfiguration class. This class features three properties to store configuration of three aspects: Criteria, Presentation, and Target. These properties have string type, however, they must be valid XML fragments. Internally, the ViewConfiguration class merges them in a single XML fragment (available as the Configuration property). SCOM Console application, in its turn, saves and loads configuration of each view (i.e. for each control inherited from the MomViewBase class).
So, as the configuration is persistent, we simply need to use the presentation aspect to save and load current column display settings. Luckily, all support methods for this task are provided in the console framework. On the top of that, the base GridViewBase class implement all event handling, loading notifications, etc., so child classes only need to override two empty virtual methods to edit and apply personalization:
protected override void ApplyPersonalization()
{
  // base.ApplyPersonalization(); -- empty virtual method to override
  if (ColumnCollection != null)
  {
    ColumnCollection.Apply(Grid);
  }
  else
  {
    if (Configuration == null)
      return;
    ColumnCollection = ViewSupport.XmlToColumnInfoCollection(Configuration.Presentation);
    ColumnCollection.Apply(Grid);
  }
}

protected override void ShowPersonalization(object sender, CommandEventArgs e)
{
  // base.ShowPersonalization(); -- empty virtual method to override
  string defaultPersonalization = null;
  if (Configuration != null && Configuration.Presentation != null)
    defaultPersonalization = Configuration.Presentation;

  using (ColumnPickerDialog columnPickerDialog = new ColumnPickerDialog(defaultPersonalization))
  {
    columnPickerDialog.Grid = Grid;
    columnPickerDialog.Groupable = false;
    if (columnPickerDialog.ShowDialog(ParentWindow) != DialogResult.OK)
      return;
    ColumnCollection = new ColumnInfoCollection(columnPickerDialog.GetColumns());
    UpdateFields(true);
    SavePersonalization(this);
  }
}
Few notes on the code above:
- The
ColumnCollectionproperty is a property of the base class, which holds all column display settings. It has theApply()method to apply settings to target grid’s columns. - The
ApplyPersonalization()method either applies existing settings from theColumnCollectionproperty, or deserializes settings from XML (using the Presentation section of the persistent configuration as discussed above) and then applies. - The
ShowPersonalization() method is automatically called when the base control receives pre-defined Command Id. This method initialize the standardColumnPickerDialogdialog with either empty configuration (if no saved configuration available) or with presentation configuration from the persistent configuration. When new column display configuration is available, it’s deserialized to theColumnCollectionproperty and applied.
Other methods listed in the Table 1 under the “Personalization Support” section simply add the “Personalize view…” item to the grid’s context menu and task list and maintain item’s state.
Grid View: other UI tweaks
There are five different places, which may change their display from context of the current view. They are:
- Context menu of the current folder item.
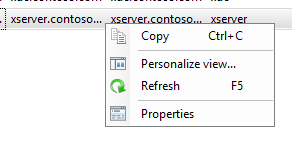
- Context menu of the current view.
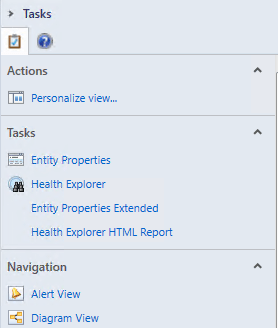
- Tasks pane and Actions task section.
- Individual row context menu.
- Toolbar.

All of these elements can be appended with new items or sections. I won’t get in much details here, but welcome you to explore this demo, and especially the Maximus Connectivity Monitoring management pack. Its UI extension component has lots of context menu and task pane actions. Many of them created dynamically based on information read from SCOM management group connection. Here, I just mention the basics.
| Aspect | How to implement |
|---|---|
| Current folder item’s context menu | Not figured out yet. |
| Toolbar | Not figured out yet. |
| Current view’s context menu | Override the AddContextMenu(ContextMenuHelper contextMenu) method and then use methods of the provided contextMenu object to add new items. |
| Tasks pane and Actions task section | Override the AddActions() method and then use AddTaskItem() methods (7 overloads) to add new action section items. To add new task sections/containers see the following example. |
| Individual row context menu | Override the AddRowContextMenu(ContextMenuHelper contextMenu, <T> data) method and then use methods of the provided contextMenu object to add new items. Currently selected item will be passed in the data parameter. |
This is the end of the second demo. One more is to go.
